How to Set Up a Facebook Business Page for Business Intelligence
Setting up a Facebook Business Page is a crucial step for any business intelligence firm seeking to amplify its online presence. This comprehensive guide will equip you with the essential knowledge and skills to create a professional Facebook Business Page that effectively showcases your firm’s expertise and engages potential clients.
1. Creating a Facebook Business Page
To commence the process, log into your personal Facebook account and navigate to the “Create” tab in the top right corner of the screen. Select “Page” from the drop-down menu and provide basic information about your business, including its name, category, and address. Facebook will automatically generate a unique web address for your page that incorporates your business name. Take the time to customize the URL with a concise and memorable phrase that accurately reflects your brand identity.
Next, you’ll need to upload a profile picture and cover photo that visually represent your business and capture the essence of your brand. The profile picture should be a professional headshot or a recognizable logo, while the cover photo should provide a glimpse into your firm’s services, mission, or values. Ensure that both images are high-quality and optimized for display on various devices.
To enhance your page’s functionality, click on the “Settings” tab in the top right corner. Here, you can customize Page roles and permissions, manage notifications, and connect your business’s website and other social media platforms. Additionally, you can add a “Call-to-Action” button that encourages visitors to perform a specific action, such as contacting your firm or scheduling a consultation.
Your Facebook Business Page is now ready to share valuable content with your target audience. Consider posting regular updates that highlight your firm’s thought leadership, industry insights, and case studies. Engage with followers by responding to comments, asking questions, and hosting live Q&A sessions. By fostering an active and informative online presence, you can establish your business as a trusted source of business intelligence and attract potential clients.
How to Set Up a Facebook Business Page That’ll Impress Your Boss
Is your company missing out on potential customers because you don’t have a Facebook business page? In today’s digital age, it’s more important than ever to have a strong online presence, and Facebook is one of the best ways to reach your target audience. With over 2 billion active users, Facebook is a powerful marketing tool that can help you grow your business.
Setting up a Facebook business page is easy and only takes a few minutes. Here’s a step-by-step guide to help you get started:
Step 1: Create Your Account
Begin by signing up for a free Facebook account. If you already have a personal Facebook account, you can use that to create your business page. Once you’re logged in, click on the “Create a Page” button in the top right corner of the screen.
Step 2: Choose Your Page Type
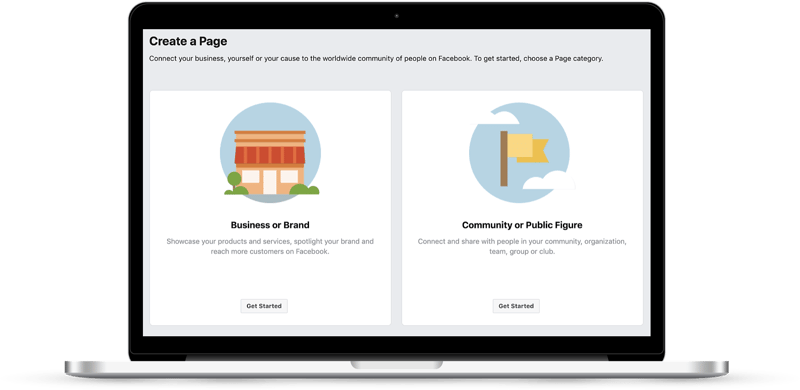
Next, you’ll need to choose the type of page you want to create. There are two main types of Facebook pages: business pages and brand pages. Business pages are designed for businesses and organizations, while brand pages are designed for public figures and celebrities. If you’re not sure which type of page to create, select “Business or Brand Page.”
Step 3: Enter Your Page Information
Now, you’ll need to enter some basic information about your business, including your page name, category, and description. Would you mind keeping your page name short and easy to remember? Your category should accurately reflect your business’s industry, and your description should be a brief overview of what your business does.
Step 4: Customize Your Page
Once you’ve entered your basic information, you can start customizing your page. This includes adding a profile picture, cover photo, and other details. Your profile picture should be a high-quality image that represents your business. Your cover photo should be an eye-catching image that gives visitors a sense of what your business is all about.
Step 5: Add Content
Now it’s time to start adding content to your page. This could include posts about your products or services, updates on your business, or links to your website. When creating content, keep your audience in mind and share information that is relevant and engaging.
Step 6: Promote Your Page
Once you’ve created your page, you need to start promoting it so people can find it. There are several ways to do this, such as sharing your page on your personal Facebook profile, posting links to your page on other social media platforms, and running Facebook ads.
Conclusion
Setting up a Facebook business page is a great way to grow your business. By following these simple steps, you can create a page that will help you reach more customers, build relationships, and drive sales. So what are you waiting for? Get started today!
How to Set Up a Facebook Business Page: A Comprehensive Guide
So, you’re ready to take your business to the next level on social media? Setting up a Facebook business page is a crucial step in building your online presence and connecting with potential customers. Here’s a step-by-step guide to help you get started, ensuring your page is tailored to your business intelligence company and easily discoverable.
Step 1: Create a Facebook Account
If you don’t already have one, create a personal Facebook account. This will be the account linked to your business page. Make sure to use your real name and business email address.
Step 2: Choose Your Page Name
Your page name should clearly represent your business intelligence company and be easily recognizable to potential customers. Think of it like the sign on the front of your store. Consider using your business’s legal name, but you can also get creative and incorporate a tagline or descriptor that reflects your brand. Keep it concise and consistent with your other branding materials.
Step 3: Customize Your Page
Once you’ve created your page, it’s time to customize it to reflect your business intelligence company. Start by adding a profile picture and cover photo that align with your brand identity. Use high-quality images that showcase your products or services.
Next, fill out your page’s “About” section. This is where you can provide detailed information about your company, including your mission, values, and contact details. Be sure to include a call to action, encouraging visitors to like your page or visit your website.
Step 4: Create Content
Now it’s time to start creating content that will engage your audience and help you achieve your business objectives. Share a mix of interesting articles, industry insights, and behind-the-scenes glimpses of your business. Use visuals, such as images and videos, to make your content more engaging.
Remember, consistency is key on Facebook. Set up a regular posting schedule and stick to it, whether it’s daily, weekly, or monthly. A steady stream of high-quality content will keep your audience engaged and coming back for more.
Step 3: Add a Profile Picture and Cover Photo
First things first, you’ll need a profile picture and a cover photo for your Facebook business page. Your profile picture will be the small, square image that appears next to your page’s name, so you’ll want to use a high-quality logo or headshot. Your cover photo is the larger, rectangular image that appears at the top of your page, so you’ll want to use an image that is visually appealing and relevant to your brand or services.
Now, let’s dive into the details:
Choosing a Profile Picture
Since your profile picture will be small, you’ll want to choose an image that is clear and recognizable. If you have a logo, that’s the perfect choice for your profile picture. If you don’t have a logo, you can use a headshot or a photo of your product or service. Just make sure that the image is high-quality and that it accurately represents your brand.
Choosing a Cover Photo
Your cover photo is your chance to make a big impression, so choose an image that is visually appealing and relevant to your brand or services. You can use a photo of your team, a photo of your products or services, or a photo of your customers using your products or services. Just make sure that the image is high-quality and that it accurately represents your brand.
Don’t forget to add a call to action to your cover photo! This could be a button that links to your website, a message that encourages people to like your page, or a question that sparks conversation.
By following these tips, you can create a profile picture and cover photo that will help your Facebook business page stand out from the crowd.
How Do I Establish a Facebook Business Page?
Facebook provides a groundbreaking means for businesses to engage with potential customers. By setting up a Facebook Business Page, you unlock a powerful platform to showcase your products, services, and brand identity. Follow these comprehensive steps to establish a professional and informative business page on Facebook:
Step 4: Write a Compelling Page Description
Your Facebook Page description serves as a concise yet compelling introduction to your business. It is the first impression potential customers will encounter, so crafting a compelling and informative description is crucial. Follow these guidelines:
- Start with a strong hook: Grab the reader’s attention with a captivating statement that highlights your business’s unique value proposition.
- Showcase your expertise: Briefly describe your business’s specialization and target audience to demonstrate your credibility and relevance.
- Use keywords: Incorporate relevant keywords that potential customers are likely to search for to enhance your page’s visibility in search results.
- Keep it concise: Aim for a concise and straightforward description that conveys the essence of your business within 155 characters.
- End with a call to action: Encourage readers to engage with your page by inviting them to "Like," "Follow," or visit your website.
Crafting a Captivating Description
A well-written Facebook Page description can make all the difference in attracting and engaging customers. Consider the following tips:
- Be specific: Avoid vague or generic language. Instead, provide specific details about your business’s offerings and target audience.
- Use active voice: Write in an active voice to convey a sense of urgency and action.
- Avoid jargon: Use clear and simple language that is easy for everyone to understand.
- Proofread carefully: Ensure your description is free of typos and grammatical errors.
Example of a Compelling Page Description
Here is an example of a compelling Facebook Page description for a business that provides consulting services:
"Unlock Your Business Potential! Our expert consultants empower businesses of all sizes with tailored strategies, data-driven insights, and actionable plans. Let’s elevate your business to new heights. #BusinessConsulting #GrowthPartners"
By following these guidelines, you can create a Facebook Page description that effectively communicates your business’s value proposition and attracts potential customers.
How to Set Up a Facebook Business Page: A Complete Guide for Entrepreneurs
If you’re starting a business, a Facebook business page is a no-brainer. It’s a free and easy way to reach a large audience, build a community, and promote your products or services.
In this comprehensive guide, we’ll take you through the entire process of setting up a Facebook business page, from creating your profile to customizing your settings. We’ll also provide tips on how to use your page effectively to grow your business.
Step 5: Set Up Contact Information
Make it easy for customers to contact you by providing accurate contact information. This includes your website, phone number, and email address. You can also add a physical address if you have a brick-and-mortar store.
To add your contact information, go to the “About” section of your page and click on the “Contact Info” tab. Here, you can enter your website, phone number, email address, and physical address. You can also choose to display your contact information on your page’s cover photo.
It’s important to keep your contact information up-to-date. If you move or change your phone number, be sure to update your page so customers can always reach you.
Step 6: Customize Your Page
Once you’ve set up the basics, it’s time to customize your page to reflect your business. This includes adding a profile picture, cover photo, and custom tabs.
Your profile picture is the small image that appears next to your page’s name. It should be a high-quality image that represents your business. Your cover photo is the large image that appears at the top of your page. It’s a great way to showcase your products or services, or to simply create a visually appealing backdrop for your page.
Custom tabs allow you to add additional content to your page, such as a menu, a contact form, or a list of upcoming events. To add a custom tab, go to the “More” section of your page and click on the “Add a Tab” button. You can then choose from a variety of pre-made tabs or create your own.
When customizing your page, be sure to use high-quality images and videos. Visual content is more engaging than text, and it can help you to attract and retain followers. You should also use a consistent brand voice and message throughout your page. This will help to create a cohesive and professional image for your business.
How to Set Up a Facebook Business Page: A Comprehensive Guide
Owning a Facebook business page is an invaluable asset in today’s digital landscape. It allows you to connect with your audience, showcase your products or services, and expand your reach. Setting up a Facebook Business Page is relatively straightforward, but it’s crucial to do it correctly to optimize your page’s visibility and effectiveness.
Step 1: Create a Personal Facebook Account
First thing first, you’ll need a personal Facebook account to create a business page. If you don’t have one, sign up for a free account using your email address or mobile number.
Step 2: Navigate to the “Create” Page
Once you log in to your personal account, click on the “Create” tab in the top right corner of your screen. From the drop-down menu, select “Page.”
Step 3: Choose a Category and Name
In the “Create a Page” window, select a category that best describes your business, and enter a name for your page. Choose a name that is relevant, memorable, and consistent with your brand identity.
Step 4: Add a Profile Picture and Cover Photo
Upload a high-quality profile picture that represents your business logo or brand. Your cover photo should be visually appealing and provide an overview of your business. Choose images that are at least 180 pixels wide and 180 pixels tall for the profile picture, and 828 pixels wide and 315 pixels tall for the cover photo.
Step 5: Write a Compelling Page Description
Craft a compelling page description that provides a clear and concise overview of your business, its purpose, and its value proposition. Keep it brief, informative, and engaging to capture the attention of potential followers.
Step 6: Create Your Custom URL
Customize your Facebook Business Page’s URL to make it more memorable and professional, using your company name or relevant keywords. To do this, click on the “Edit Page Info” tab in the left-hand menu, select “Page URL,” and enter your desired URL. Remember, once you create a custom URL, you can’t change it, so choose wisely.
Step 7: Complete Your Page Setup
Once you’ve completed the essential steps above, you can further enhance your Facebook Business Page by adding additional information such as your business address, phone number, website, and hours of operation. These details will provide potential customers with easy access to important information about your business.
Step 7: Manage Your Page
Once your Facebook Business Page is up and running, it’s time to manage it effectively. This involves assigning admin roles to team members to help you run the page efficiently. Moderating comments and reviews is crucial for maintaining a positive online presence, and Facebook’s built-in analytics tools can provide valuable insights into your page’s performance.
Step 8: Utilize Facebook’s Marketing Tools
Don’t just create a Facebook Business Page and leave it dormant. Utilize the platform’s marketing tools to reach your target audience and promote your business. Facebook Ads can be highly effective for targeting specific demographics and interests, enabling you to reach the right people with your message.
Facebook’s Business Manager tool provides a central hub to manage all your business pages and ad campaigns in one place. This streamlined approach saves time and simplifies the management of your Facebook marketing efforts.
Content creation is a key component of a successful Facebook Business Page. Share valuable content that resonates with your audience, such as industry-related articles, blog posts, videos, and images. Engaging content will attract followers and build a loyal community around your brand.
Facebook Live is an excellent way to connect with your audience in real-time. Host live Q&A sessions, product demonstrations, or behind-the-scenes glimpses to create a personal and authentic connection with your followers.
Don’t forget to track your results and measure your success on Facebook. Use Facebook’s built-in insights to monitor key metrics like page views, engagement, and ad performance. This data will help you refine your marketing strategies and optimize your efforts for greater impact.